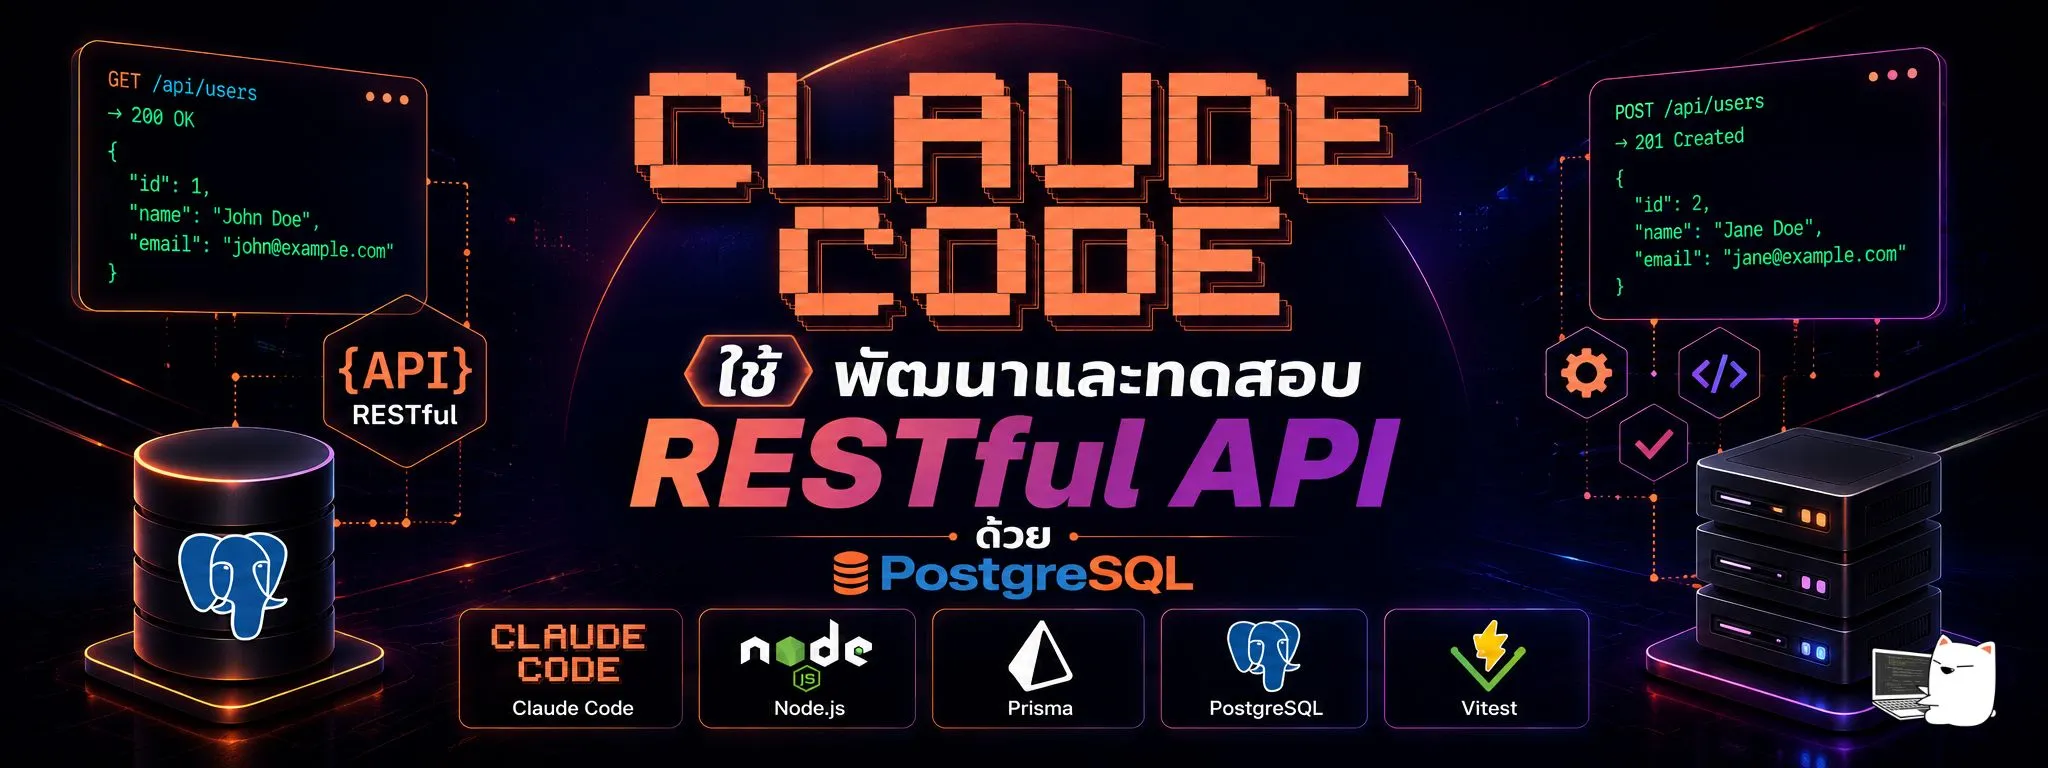
ใช้ Claude Code พัฒนาและทดสอบ RESTful API ด้วย PostgreSQL
ใช้ Claude Code สร้าง RESTful API ด้วย Prisma ORM และ PostgreSQL และเขียน Unit Test ด้วย Vitest และ Supertest
บทความนี้จะแสดงการพัฒนา RESTful API แบบครบวงจรโดยใช้ Claude Code เป็นผู้ช่วยในการสร้างโค้ด ร่วมกับ Prisma ORM สำหรับจัดการฐานข้อมูล PostgreSQL และใช้ Vitest กับ Supertest สำหรับการทดสอบ API แบบอัตโนมัติ

สถาปัตยกรรมโดยรวม#
ระบบประกอบด้วย 3 ส่วนหลัก ได้แก่
1. Development Layer#
Claude Code ถูกใช้เพื่อช่วยสร้างโครงสร้างโปรเจค เขียน Prisma Schema สร้าง API Endpoints และสร้าง Test Cases ลดเวลาในการพัฒนาและช่วยให้ได้โค้ดที่เป็นมาตรฐานมากขึ้น
2. Application Layer#
Application Layer ประกอบด้วย
- Express + TypeScript สำหรับสร้าง RESTful API
- Prisma ORM สำหรับจัดการฐานข้อมูลแบบ Type-safe
- PostgreSQL สำหรับจัดเก็บข้อมูล
เมื่อ Client ส่ง HTTP Request เข้ามา Express จะประมวลผลคำขอ จากนั้น Prisma จะจัดการ Query ข้อมูลจาก PostgreSQL และส่งผลลัพธ์กลับเป็น JSON Response
3. Testing Layer#
Testing Layer ประกอบด้วย
- Vitest ทำหน้าที่เป็น Test Runner
- Supertest ใช้จำลอง HTTP Requests ไปยัง API
Supertest จะส่ง Request ไปยัง Express Application โดยตรงโดยไม่ต้องเปิด Web Server จริง ทำให้การทดสอบทำได้รวดเร็วและเหมาะสำหรับ Continuous Integration (CI)
เมื่อจบบทความ ผู้อ่านจะสามารถสร้าง RESTful API ที่เชื่อมต่อ PostgreSQL พร้อมระบบ Automated Testing ได้ครบทั้งกระบวนการ ตั้งแต่การออกแบบฐานข้อมูลไปจนถึงการทดสอบ API ในระดับ Production-ready เบื้องต้น
1. วัตถุประสงค์#
- เรียนรู้การใช้ Claude Code สร้าง API อัตโนมัติ
- เข้าใจการใช้ Prisma ORM แทนการเขียน SQL ด้วยตัวเอง
- ติดตั้งและตั้งค่า Vitest และ Supertest สำหรับ ESM
- เขียน Unit Test สำหรับ CRUD Operations
- ตรวจสอบ HTTP Status Code และ Response Data
2. ติดตั้ง Claude Code#
หมายเหตุ: หากสมัครสมาชิก Claude Pro หรือ Claude Max อยู่แล้ว สามารถข้ามขั้นตอน “ตั้งค่า GLM เป็น Model Provider” ด้านล่างได้เลย เนื่องจาก Claude Code จะใช้บัญชี Claude โดยตรง
Native Install#
macOS, Linux, WSL:
curl -fsSL https://claude.ai/install.sh | bashWindows PowerShell:
irm https://claude.ai/install.ps1 | iexWindows CMD:
curl -fsSL https://claude.ai/install.cmd -o install.cmd && install.cmd && del install.cmd
ตั้งค่า GLM เป็น Model Provider#
ขั้นตอนที่ 1: รับ API Key จาก Z.AI#
- เข้า Z.AI Platform ↗ และลงทะเบียนหรือเข้าสู่ระบบ
- ไปที่หน้า API Keys
- สร้าง API Key ใหม่
- คัดลอก API Key ไว้ใช้ในขั้นตอนถัดไป

ขั้นตอนที่ 2: ตั้งค่า GLM Coding Plan#
ใช้ Coding Tool Helper เพื่อตั้งค่าอัตโนมัติ:
npx @z_ai/coding-helper
กด Enter เพื่อเลือกตัวเลือก API Key แล้ววาง API Key


3. การตั้งค่าฐานข้อมูล PostgreSQL ด้วย CAMPP#
3.1. ติดตั้งและเริ่มต้น CAMPP#
CAMPP เป็น Local Web Development Stack ที่รวม Caddy, PHP, PostgreSQL และ Adminer ไว้ด้วยกัน สามารถดาวน์โหลดได้จาก https://campp.melivecode.com/ ↗
ขั้นตอนการติดตั้ง:
- ดาวน์โหลด CAMPP จากเว็บไซต์
- ติดตั้งตามประเภทระบบปฏิบัติการที่ใช้อยู่
- เมื่อเปิด CAMPP ครั้งแรก จะมีหน้าต่างให้เลือกติดตั้งส่วนเสริม — ให้ติดตั้ง PostgreSQL และ Adminer ด้วย

- เปิด CAMPP และกด Start Caddy, PHP, และ PostgreSQL

ข้อมูลการเชื่อมต่อ PostgreSQL เริ่มต้นของ CAMPP:
| การตั้งค่า | ค่า |
|---|---|
| Host | localhost |
| Port | 5433 (ไม่ใช่ 5432 เพื่อหลีกเลี่ยงความขัดแย้ง) |
| Username | root |
| Password | (ตามที่ระบุใน CAMPP) |
หมายเหตุ: CAMPP ใช้พอร์ต 5433 สำหรับ PostgreSQL เพื่อหลีกเลี่ยงความขัดแย้งกับบริการ PostgreSQL อื่นที่อาจทำงานอยู่บนเครื่อง
3.2. สร้างฐานข้อมูล#
เข้าถึง Adminer ผ่าน CAMPP:
- กดปุ่ม Adminer ที่ Dashboard ของ CAMPP
- จะเปิดหน้า Adminer ขึ้นมา

ล็อกอินเข้าสู่ Adminer:
- เลือก PostgreSQL เป็นระบบฐานข้อมูล
- กรอก Username:
rootและ Password ตามที่ระบุใน CAMPP - คลิก Login

สร้างฐานข้อมูลใหม่:
- คลิกที่ Create database
- ตั้งชื่อฐานข้อมูล:
test_db - คลิก Save

สำคัญ: สำหรับ Prisma เราไม่ต้องสร้างตารางเองด้วย SQL — Prisma จะสร้างตารางให้อัตโนมัติผ่าน Migration
4. สร้างโปรเจคด้วย Claude Code#
4.1 สร้างโปรเจคและติดตั้ง Dependencies#
mkdir api-testing-demo
cd api-testing-demo
npm init -yติดตั้ง Dependencies:
# Production Dependencies
npm install express cors @prisma/client @prisma/adapter-pg pg dotenv

# Development Dependencies
npm install -D typescript tsx prisma vitest supertest @types/supertest @types/express @types/pg @types/nodeคำอธิบาย Package ที่ติดตั้ง:
| Package | วัตถุประสงค์ |
|---|---|
express | เฟรมเวิร์ก API |
cors | เปิดใช้งาน cross-origin requests |
@prisma/client | Prisma Client สำหรับ type-safe database queries |
@prisma/adapter-pg | Driver adapter เชื่อมต่อ Prisma กับ PostgreSQL |
pg | node-postgres database driver |
dotenv | โหลด environment variables จากไฟล์ .env |
prisma | Prisma CLI สำหรับ migration และ generate |
vitest | Testing Framework รองรับ ESM โดยไม่ต้องตั้งค่าเพิ่ม |
supertest | HTTP testing library |
4.2 ตั้งค่า TypeScript และ ESM#
สร้างไฟล์ tsconfig.json:
{
  "compilerOptions": {
    "module": "ESNext",
    "moduleResolution": "bundler",
    "target": "ES2023",
    "strict": true,
    "esModuleInterop": true,
    "ignoreDeprecations": "6.0",
    "resolveJsonModule": true,
    "skipLibCheck": true,
    "types": ["node"]
  }
}อัปเดต package.json เพื่อเปิดใช้งาน ESM:
{
  "type": "module"
}เพิ่ม script start ใน package.json สำหรับรันโปรเจค:
{
  "scripts": {
    "start": "tsx index.ts"
  }
}หลังจากนั้นสามารถรันโปรเจคด้วยคำสั่ง (ยังไม่ต้องรันตอนนี้):
npm start4.3 โครงสร้างไฟล์#
api-testing-demo/
├── prisma/
│   └── schema.prisma
├── lib/
│   └── prisma.ts
├── index.ts
├── prisma.config.ts
├── tsconfig.json
├── package.json
└── .env4.4 สร้างไฟล์ Prisma Config และ Client ด้วยตัวเอง#
ก่อนใช้ Prompt กับ Claude Code ให้รันคำสั่ง npx prisma init ก่อนเพื่อสร้างไฟล์เริ่มต้น:
npx prisma init --output ../generated/prismaคำสั่งนี้จะสร้างไฟล์ต่อไปนี้ให้อัตโนมัติ:
prisma/schema.prisma— Prisma Schema พร้อม providerpostgresqlprisma.config.ts— Prisma Config สำหรับ datasource URL.env— ไฟล์ environment variables
จากนั้นสร้างไฟล์ที่สำคัญ 1 ไฟล์นี้ด้วยตัวเอง เพื่อให้แน่ใจว่า import path ถูกต้อง
สร้างไฟล์ lib/prisma.ts:
import "dotenv/config";
import { PrismaPg } from "@prisma/adapter-pg";
import { PrismaClient } from "../generated/prisma/client";

const connectionString = `${process.env.DATABASE_URL}`;

const adapter = new PrismaPg({ connectionString });
const prisma = new PrismaClient({ adapter });

export { prisma };สำคัญ: สร้างไฟล์นี้ด้วยตัวเองก่อนใช้ Prompt เพราะ Claude Code อาจสร้าง import path ที่ไม่ถูกต้อง เช่น ใช้
"../generated/prisma/index.js"หรือใช้ default import สำหรับPrismaPgซึ่งจะทำให้โปรเจคไม่ทำงาน
แก้ไขไฟล์ .env (สร้างโดย npx prisma init):
DATABASE_URL="postgresql://root:your_password@localhost:5433/test_db"สำคัญ:
- เปลี่ยน
your_passwordเป็นรหัสผ่าน PostgreSQL ที่ตั้งไว้ใน CAMPP- CAMPP ใช้พอร์ต 5433 ไม่ใช่ 5432
4.5 ใช้ Claude Code สร้างโปรเจค#
เปิด Claude Code ในโฟลเดอร์โปรเจค:
cd api-testing-demo
claude
ใช้ Prompt นี้เลย:
Build a RESTful API using Express, TypeScript, Prisma ORM with PostgreSQL and ESM modules.

=== PROJECT STRUCTURE ===

api-testing-demo/
├── prisma/
│   └── schema.prisma
├── prisma.config.ts
├── lib/
│   └── prisma.ts
├── index.ts
├── tsconfig.json
├── package.json
└── .env

=== PRISMA SETUP ===

NOTE: .env, prisma.config.ts and lib/prisma.ts already exist — do NOT recreate or modify them.

prisma/schema.prisma:
- generator client: provider "prisma-client", output "../generated/prisma"
- datasource db: provider "postgresql" (no url field — use prisma.config.ts)
- User model: id (auto-increment), fname, lname, username (unique), email (unique), avatar (optional), createdAt (auto)

=== API ROUTES ===

- GET /          → 200, welcome message
- GET /users     → 200, return all users
- GET /users/:id → 200 (found) or 404 (not found)
- POST /users    → 201, create and return user
- PUT /users/:id → 200, update and return user
- DELETE /users/:id → 200, return success message

=== API RULES ===

- server runs on port 3333
- use Prisma Client from lib/prisma.ts for all database operations
- JSON responses only
- proper HTTP status codes: 200, 201, 404, 500
- centralized error handling
- export app for testing (don't start server when imported)
- use process.env.TEST_ENV to prevent server start during tests
- ESM compatible (import/export)
- no `any` type

=== OUTPUT ===

1. Complete code for every file
2. Commands to initialize Prisma, run migration, and start the server
3. All code must work together without modification
ระหว่างการทำงาน Claude Code จะขออนุญาตก่อนแก้ไขหรือสร้างไฟล์ — อนุญาตได้เลย

เมื่อ Claude Code เขียนโค้ดเสร็จ จะแสดงคำสั่งที่ต้องรันถัดไป:

หลังจากนั้น แนะนำให้รัน /init เพื่อสร้างไฟล์ CLAUDE.md ที่เก็บรายละเอียดโปรเจค — จะช่วยให้ Claude Code เข้าใจโครงสร้างโปรเจคได้ดีขึ้นในการใช้งานครั้งต่อไป:
/init
5. รัน Prisma Migration#
หลัง Claude Code เขียนโค้ดเสร็จ ให้เปิด Terminal ใหม่ใน VS Code ด้วยการกด Ctrl+`

# สร้างตารางในฐานข้อมูล
npx prisma migrate dev --name init
คำสั่ง prisma migrate dev --name init จะ:
- อ่าน
prisma/schema.prismaและprisma.config.ts - สร้าง SQL migration file ใน
prisma/migrations/ - สร้างตาราง User ในฐานข้อมูลอัตโนมัติ
เปิด Adminer เพื่อดูตารางที่ถูกสร้างโดย Prisma Migration:

จากนั้นสร้าง Prisma Client:
npx prisma generateคำสั่ง prisma generate จะ:
- อ่าน
prisma/schema.prismaและสร้าง Prisma Client ในโฟลเดอร์generated/prisma/ - Prisma Client นี้คือสิ่งที่เรา import มาใช้ใน
lib/prisma.tsสำหรับ type-safe database queries
ข้อดีของ Prisma เมื่อเทียบกับการเขียน SQL เอง:
- ไม่ต้องเขียน
CREATE TABLESQL ด้วยตัวเอง - Schema เป็น single source of truth — แก้ไขที่เดียว ฐานข้อมูลอัปเดตอัตโนมัติ
- Migration สามารถย้อนกลับได้
- Prisma Client ให้ type-safe queries โดยอัตโนมัติ
6. ตัวอย่างโค้ดที่ Claude Code สร้างให้#
6.1 Prisma Schema (prisma/schema.prisma)#
generator client {
  provider = "prisma-client"
  output   = "../generated/prisma"
}

datasource db {
  provider = "postgresql"
}

model User {
  id        Int      @id @default(autoincrement())
  fname     String
  lname     String
  username  String   @unique
  email     String   @unique
  avatar    String?
  createdAt DateTime @default(now())
}จุดสำคัญ:
@unique— ทำให้ username และ email ไม่ซ้ำกันString?— avatar เป็น optional (สามารถเป็น null ได้)@default(autoincrement())— สร้าง id อัตโนมัติ@default(now())— บันทึกเวลาสร้างอัตโนมัติ- ไม่มี
urlใน datasource — ใช้prisma.config.tsแทน
6.2 API Server (index.ts)#
import "dotenv/config";
import express, { Request, Response, NextFunction } from "express";
import { prisma } from "./lib/prisma.js";

const app = express();
const PORT = 3333;

app.use(express.json());

interface ErrorResponse {
  error: string;
}

type AsyncHandler = (req: Request, res: Response, next: NextFunction) => Promise<void>;

const asyncHandler = (fn: AsyncHandler): AsyncHandler => {
  return (req: Request, res: Response, next: NextFunction) => {
    Promise.resolve(fn(req, res, next)).catch(next);
  };
};

app.get("/", (_req: Request, res: Response) => {
  res.status(200).json({ message: "Welcome to the API" });
});

app.get("/users", asyncHandler(async (_req: Request, res: Response) => {
  const users = await prisma.user.findMany();
  res.status(200).json(users);
}));

app.get("/users/:id", asyncHandler(async (req: Request, res: Response) => {
  const id = Number(req.params.id);

  if (isNaN(id)) {
    res.status(400).json({ error: "Invalid user ID" } as ErrorResponse);
    return;
  }

  const user = await prisma.user.findUnique({
    where: { id },
  });

  if (!user) {
    res.status(404).json({ error: "User not found" } as ErrorResponse);
    return;
  }

  res.status(200).json(user);
}));

app.post("/users", asyncHandler(async (req: Request, res: Response) => {
  const { fname, lname, username, email, avatar } = req.body;

  if (!fname || !lname || !username || !email) {
    res.status(400).json({ error: "Missing required fields: fname, lname, username, email" } as ErrorResponse);
    return;
  }

  const user = await prisma.user.create({
    data: {
      fname,
      lname,
      username,
      email,
      avatar: avatar ?? null,
    },
  });

  res.status(201).json(user);
}));

app.put("/users/:id", asyncHandler(async (req: Request, res: Response) => {
  const id = Number(req.params.id);

  if (isNaN(id)) {
    res.status(400).json({ error: "Invalid user ID" } as ErrorResponse);
    return;
  }

  const { fname, lname, username, email, avatar } = req.body;

  const user = await prisma.user.update({
    where: { id },
    data: {
      ...(fname !== undefined && { fname }),
      ...(lname !== undefined && { lname }),
      ...(username !== undefined && { username }),
      ...(email !== undefined && { email }),
      ...(avatar !== undefined && { avatar: avatar ?? null }),
    },
  });

  res.status(200).json(user);
}));

app.delete("/users/:id", asyncHandler(async (req: Request, res: Response) => {
  const id = Number(req.params.id);

  if (isNaN(id)) {
    res.status(400).json({ error: "Invalid user ID" } as ErrorResponse);
    return;
  }

  await prisma.user.delete({
    where: { id },
  });

  res.status(200).json({ message: "User deleted successfully" });
}));

app.use((err: Error, _req: Request, res: Response, _next: NextFunction) => {
  console.error(err);
  res.status(500).json({ error: "Internal server error" } as ErrorResponse);
});

if (!process.env.TEST_ENV) {
  app.listen(PORT, () => {
    console.log(`Server running on http://localhost:${PORT}`);
  });
}

export default app;เปรียบเทียบ Prisma vs pg:
| การทำงาน | pg (SQL) | Prisma ORM |
|---|---|---|
| ดึงข้อมูลทั้งหมด | pool.query('SELECT * FROM users') | prisma.user.findMany() |
| ดึงข้อมูลด้วย ID | pool.query('SELECT * FROM users WHERE id = $1', [id]) | prisma.user.findUnique({ where: { id } }) |
| สร้างข้อมูล | pool.query('INSERT INTO users (...) VALUES ($1, $2, ...)', [...]) | prisma.user.create({ data: {...} }) |
| อัปเดตข้อมูล | pool.query('UPDATE users SET ... WHERE id = $1', [...]) | prisma.user.update({ where: { id }, data: {...} }) |
| ลบข้อมูล | pool.query('DELETE FROM users WHERE id = $1', [id]) | prisma.user.delete({ where: { id } }) |
จุดสำคัญในโค้ด:
asyncHandler— wrapper สำหรับจัดการ async error โดยอัตโนมัติ ไม่ต้องเขียน try/catch ในทุก routeErrorResponse— interface สำหรับรูปแบบ error response ที่สอดคล้องกันprisma.user.findMany()— ดึงข้อมูลทั้งหมดจากตาราง usersprisma.user.findUnique({ where: { id } })— ดึงข้อมูลด้วย primary keyprisma.user.create({ data: {...} })— สร้างข้อมูลใหม่prisma.user.update({ where: { id }, data: {...} })— อัปเดตเฉพาะฟิลด์ที่ส่งมาprisma.user.delete({ where: { id } })— ลบข้อมูล- centralized error handling — ใช้ middleware จัดการ error ทุกกรณีจากที่เดียว
- ไม่ต้องใช้
$1placeholders เพราะ Prisma ป้องกัน SQL Injection อัตโนมัติ - ESM syntax — ใช้
import/exportแทนrequire/module.exports
7. ทดสอบ API ด้วย cURL และ Postman#
ก่อนเขียน Unit Test แบบอัตโนมัติ ให้ทดสอบ API ด้วยมือก่อนเพื่อยืนยันว่าทำงานถูกต้อง
เริ่มต้นรันเซิร์ฟเวอร์:
npm start7.1 ทดสอบด้วย cURL (macOS / Linux / WSL)#
# GET - ตรวจสอบว่า API ทำงาน
curl http://localhost:3333/

# GET - ดึงข้อมูล users ทั้งหมด
curl http://localhost:3333/users

# POST - สร้าง user ใหม่
curl -X POST http://localhost:3333/users \
  -H "Content-Type: application/json" \
  -d '{"fname":"John","lname":"Doe","username":"johndoe","email":"john@example.com","avatar":"https://example.com/avatar.jpg"}'

# GET - ดึงข้อมูล user ตาม ID (เปลี่ยน 1 เป็น ID ที่ได้จากการสร้าง)
curl http://localhost:3333/users/1

# PUT - อัปเดตข้อมูล user
curl -X PUT http://localhost:3333/users/1 \
  -H "Content-Type: application/json" \
  -d '{"fname":"Jane","lname":"Smith"}'

# DELETE - ลบ user
curl -X DELETE http://localhost:3333/users/17.2 ทดสอบด้วย cURL (Windows CMD)#
# GET - ตรวจสอบว่า API ทำงาน
curl http://localhost:3333/

# GET - ดึงข้อมูล users ทั้งหมด
curl http://localhost:3333/users

# POST - สร้าง user ใหม่
curl -X POST http://localhost:3333/users ^
  -H "Content-Type: application/json" ^
  -d "{\"fname\":\"John\",\"lname\":\"Doe\",\"username\":\"johndoe\",\"email\":\"john@example.com\",\"avatar\":\"https://example.com/avatar.jpg\"}"

# GET - ดึงข้อมูล user ตาม ID (เปลี่ยน 1 เป็น ID ที่ได้จากการสร้าง)
curl http://localhost:3333/users/1

# PUT - อัปเดตข้อมูล user
curl -X PUT http://localhost:3333/users/1 ^
  -H "Content-Type: application/json" ^
  -d "{\"fname\":\"Jane\",\"lname\":\"Smith\"}"

# DELETE - ลบ user
curl -X DELETE http://localhost:3333/users/17.3 ทดสอบด้วย Postman#
- เปิด Postman และสร้าง Request ใหม่
- GET
http://localhost:3333/— ตรวจสอบว่า API ทำงาน - GET
http://localhost:3333/users— ดึงข้อมูล users ทั้งหมด - POST
http://localhost:3333/users— สร้าง user ใหม่- เลือก Body → raw → JSON
- ใส่ข้อมูล:
json{ "fname": "John", "lname": "Doe", "username": "johndoe", "email": "john@example.com", "avatar": "https://example.com/avatar.jpg" } - PUT
http://localhost:3333/users/1— อัปเดตข้อมูล user- เลือก Body → raw → JSON
- ใส่ข้อมูลที่ต้องการอัปเดต:
json{ "fname": "Jane", "lname": "Smith" } - DELETE
http://localhost:3333/users/1— ลบ user
8. เครื่องมือที่ใช้ในการทดสอบ#
9.1 Vitest#
Vitest เป็น Testing Framework ที่สร้างบน Vite รองรับ ESM โดยไม่ต้องตั้งค่าเพิ่ม
ข้อดี:
- รองรับ ESM และ TypeScript โดยไม่ต้องตั้งค่าเพิ่ม
- เร็วเพราะใช้ Vite transform
- รองรับ Async/Await
- แสดงผลการทดสอบที่อ่านง่าย
- มี Code Coverage Report
- มี Vitest UI สำหรับดูผลการทดสอบแบบกราฟิก
9.2 Supertest#
Supertest เป็น Library สำหรับทดสอบ HTTP Server
ข้อดี:
- ทำงานร่วมกับ Express ได้ดี
- รองรับการส่ง HTTP Request ทุกประเภท
- ตรวจสอบ Response ได้ครบถ้วน
- เขียน Test Case ได้อ่านเข้าใจง่าย
9. ตั้งค่า Vitest#
10.1 สร้างไฟล์ vitest.config.ts#
import { defineConfig } from "vitest/config";

export default defineConfig({
  test: {
    environment: "node",
    setupFiles: ["./vitest.setup.ts"],
  },
});10.2 สร้างไฟล์ vitest.setup.ts#
// Load environment variables for testing
import "dotenv/config";
import { afterAll } from "vitest";

// Set test environment variable
process.env.TEST_ENV = "true";

// Close Prisma connection after all tests complete
import { prisma } from "./lib/prisma";

afterAll(async () => {
  await prisma.$disconnect();
});จุดสำคัญ:
process.env.TEST_ENV = "true"— ป้องกันไม่ให้เซิร์ฟเวอร์เริ่มทำงานระหว่างการทดสอบafterAll— ปิดการเชื่อมต่อ Prisma หลังการทดสอบเสร็จสิ้น
10.3 ตั้งค่า NPM Scripts#
เพิ่มใน package.json:
{
  "scripts": {
    "test": "vitest run",
    "test:watch": "vitest",
    "test:coverage": "vitest run --coverage",
    "test:ui": "vitest --ui",
    "start": "tsx index.ts"
  }
}คำอธิบาย Scripts:
vitest run— รันการทดสอบครั้งเดียวvitest— รันการทดสอบแบบ watch modevitest run --coverage— รันพร้อม Code Coveragevitest --ui— เปิด Vitest UI สำหรับดูผลการทดสอบแบบกราฟิกtsx index.ts— รันเซิร์ฟเวอร์ด้วย tsx (TypeScript runner)
10. เขียน Test Cases#
11.1 ใช้ Claude Code สร้าง Test Cases#
ในโฟลเดอร์โปรเจค ใช้ Prompt นี้กับ Claude Code:
Create tests/api.test.ts using Vitest and Supertest to test the Express API in index.ts.

=== SETUP ===
- import { describe, it, expect, beforeAll } from "vitest"
- import { default as supertest } from "supertest"
- import type { Express } from "express"
- define TypeScript types: User, CreateUserRequest
- load the app with dynamic import in beforeAll(), type as Express
- no `any` type

=== TEST CASES ===
Use nested describe() for each endpoint. Tests run sequentially sharing createdUserId.
- GET / → 200, verify welcome message
- POST /users → 201, create user with unique username/email (use Date.now()), save createdUserId
- GET /users/:id → 200, verify created user data
- PUT /users/:id → 200, update user, verify updated data
- DELETE /users/:id → 200, verify deletion message
- GET /users/:id after deletion → 404

=== ASSERTIONS ===
- use toMatchObject() to verify multiple properties at once
- use toEqual() for exact object matching
- use toMatch() with regex for dynamic values
- use toBeDefined() to check field existence

=== RULES ===
- ESM compatible (import/export)
- production-quality TypeScriptClaude Code จะสร้างไฟล์ tests/api.test.ts ให้อัตโนมัติ
11.2 ตัวอย่างโค้ดที่ Claude Code สร้างให้ (tests/api.test.ts)#
import { describe, it, expect, beforeAll } from "vitest";
import supertest from "supertest";
import type { Express } from "express";

// Types matching the API structure
interface User {
  id: number;
  fname: string;
  lname: string;
  username: string;
  email: string;
  avatar: string | null;
  createdAt: string;
}

interface ErrorResponse {
  error: string;
}

interface CreateUserRequest {
  fname: string;
  lname: string;
  username: string;
  email: string;
  avatar?: string;
}

interface UpdateUserRequest {
  fname?: string;
  lname?: string;
  username?: string;
  email?: string;
  avatar?: string;
}

interface WelcomeResponse {
  message: string;
}

let app: Express;
let request: supertest.Agent;

// Shared state between tests
let createdUserId: number;

// Unique data using timestamp for test isolation
const timestamp = Date.now();
const testUser: CreateUserRequest = {
  fname: "Test",
  lname: "User",
  username: `testuser_${timestamp}`,
  email: `testuser_${timestamp}@example.com`,
  avatar: "https://example.com/avatar.png",
};

beforeAll(async () => {
  // Dynamic import to get the Express app
  const module = await import("../index.js");
  app = module.default;
  request = supertest(app);
});

describe("API Integration Tests", () => {
  describe("GET /", () => {
    it("should return 200 and welcome message", async () => {
      const response = await request.get("/").expect(200);

      expect(response.body).toMatchObject<WelcomeResponse>({
        message: "Welcome to the API",
      });
    });
  });

  describe("POST /users", () => {
    it("should return 201 and create user with unique username/email", async () => {
      const response = await request.post("/users").send(testUser).expect(201);

      expect(response.body).toMatchObject<User>({
        fname: testUser.fname,
        lname: testUser.lname,
        username: testUser.username,
        email: testUser.email,
        avatar: testUser.avatar,
      });

      expect(response.body.id).toBeDefined();
      expect(response.body.createdAt).toBeDefined();

      // Store the created user ID for subsequent tests
      createdUserId = response.body.id;
    });

    it("should return 400 when required fields are missing", async () => {
      const incompleteUser = { fname: "Only" };

      const response = await request.post("/users").send(incompleteUser).expect(400);

      expect(response.body).toMatchObject<ErrorResponse>({
        error: "Missing required fields: fname, lname, username, email",
      });
    });
  });

  describe("GET /users/:id", () => {
    it("should return 200 and the created user data", async () => {
      const response = await request.get(`/users/${createdUserId}`).expect(200);

      expect(response.body).toEqual<User>({
        id: createdUserId,
        fname: testUser.fname,
        lname: testUser.lname,
        username: testUser.username,
        email: testUser.email,
        avatar: testUser.avatar,
        createdAt: response.body.createdAt,
      });
    });

    it("should return 404 when user does not exist", async () => {
      const nonExistentId = 999999;

      const response = await request.get(`/users/${nonExistentId}`).expect(404);

      expect(response.body).toMatchObject<ErrorResponse>({
        error: "User not found",
      });
    });

    it("should return 400 when ID is invalid", async () => {
      const response = await request.get("/users/invalid").expect(400);

      expect(response.body).toMatchObject<ErrorResponse>({
        error: "Invalid user ID",
      });
    });
  });

  describe("PUT /users/:id", () => {
    it("should return 200 and update user data", async () => {
      const updateData: UpdateUserRequest = {
        fname: "Updated",
        lname: "Name",
        avatar: null,
      };

      const response = await request.put(`/users/${createdUserId}`).send(updateData).expect(200);

      expect(response.body).toMatchObject<User>({
        id: createdUserId,
        fname: updateData.fname,
        lname: updateData.lname,
        username: testUser.username,
        email: testUser.email,
        avatar: updateData.avatar ?? null,
      });
    });

    it("should return 400 when ID is invalid", async () => {
      const response = await request.put("/users/invalid").send({ fname: "Test" }).expect(400);

      expect(response.body).toMatchObject<ErrorResponse>({
        error: "Invalid user ID",
      });
    });
  });

  describe("DELETE /users/:id", () => {
    it("should return 200 and delete user", async () => {
      const response = await request.delete(`/users/${createdUserId}`).expect(200);

      expect(response.body).toEqual({
        message: "User deleted successfully",
      });
    });

    it("should return 400 when ID is invalid", async () => {
      const response = await request.delete("/users/invalid").expect(400);

      expect(response.body).toMatchObject<ErrorResponse>({
        error: "Invalid user ID",
      });
    });

    it("should return 404 when trying to get deleted user", async () => {
      const response = await request.get(`/users/${createdUserId}`).expect(404);

      expect(response.body).toMatchObject<ErrorResponse>({
        error: "User not found",
      });
    });
  });

  describe("GET /users", () => {
    it("should return 200 and array of users", async () => {
      const response = await request.get("/users").expect(200);

      expect(Array.isArray(response.body)).toBe(true);
      expect(response.body).toBeDefined();
    });
  });
});สังเกต:
- ใช้
dynamic importในbeforeAllเพื่อรองรับ ESM - กำหนด interface สำหรับ
User,ErrorResponse,CreateUserRequest,UpdateUserRequest,WelcomeResponseเพื่อ type safety - ใช้
supertest.Agentสร้าง request instance ครั้งเดียวในbeforeAll - ใช้
.expect(status)แบบ chain แทนการเช็คresponse.statusทีหลัง - ใช้
describe()ซ้อนกันจัดกลุ่มตาม endpoint - ใช้
toMatchObject<T>()ตรวจสอบ response พร้อม type assertion - ทดสอบทั้ง success cases (200, 201) และ error cases (400, 404)
11.3 คำอธิบาย Test Structure#
beforeAll()— โหลด app ด้วย dynamic import ก่อนรัน tests (จำเป็นสำหรับ ESM)describe()— จัดกลุ่ม Test Cases ตาม endpoint เช่นdescribe("POST /users", ...)it()— กำหนด Test Case เดี่ยวcreatedUserId— เก็บ ID ของข้อมูลที่สร้างขึ้นเพื่อใช้ในการทดสอบต่อDate.now()— สร้าง Unique Value เพื่อหลีกเลี่ยงข้อมูลซ้ำ.send()— ส่งข้อมูลใน Request Bodyexpect()— ตรวจสอบผลลัพธ์
11.4 Vitest Matchers ที่ใช้บ่อย#
| Matcher | ความหมาย | ตัวอย่าง |
|---|---|---|
.toBe() | เท่ากับ (===) | expect(status).toBe(200) |
.toEqual() | เท่ากับ (deep equality) | expect(body).toEqual({message: "ok"}) |
.toMatchObject() | ตรงกับบาง properties | expect(body).toMatchObject({fname: "John"}) |
.toContain() | มีข้อความ/ค่านั้น | expect(text).toContain('success') |
.toBeDefined() | มีค่า defined | expect(body.id).toBeDefined() |
.toMatch() | ตรงกับ regex | expect(username).toMatch(/^johndoe_\d+$/) |
11. รันการทดสอบ#
12.1 รันการทดสอบ#
# รันการทดสอบครั้งเดียว
npm test12.2 ผลลัพธ์การทดสอบที่คาดหวัง (Vitest)#
 ✓ tests/api.test.ts (12 tests) 435ms
   ✓ API Integration Tests (12)
     ✓ GET / (1)
       ✓ should return 200 and welcome message 20ms
     ✓ POST /users (2)
       ✓ should return 201 and create user with unique username/email 253ms
       ✓ should return 400 when required fields are missing 4ms
     ✓ GET /users/:id (3)
       ✓ should return 200 and the created user data 17ms
       ✓ should return 404 when user does not exist 5ms
       ✓ should return 400 when ID is invalid 3ms
     ✓ PUT /users/:id (2)
       ✓ should return 200 and update user data 8ms
       ✓ should return 400 when ID is invalid 3ms
     ✓ DELETE /users/:id (3)
       ✓ should return 200 and delete user 7ms
       ✓ should return 400 when ID is invalid 3ms
       ✓ should return 404 when trying to get deleted user 3ms
     ✓ GET /users (1)
       ✓ should return 200 and array of users 6ms

 Test Files  1 passed (1)
      Tests  12 passed (12)
   Start at  14:01:37
Duration 2.60s (transform 95ms, setup 245ms, import 1.08s, tests 435ms, environment 0ms)12. การทดสอบ Error Cases เพิ่มเติม#
13.1 ใช้ Claude Code สร้าง Error Test Cases#
ใช้ Prompt นี้กับ Claude Code:
Add error handling test cases to tests/api.test.ts for the Express API in index.ts.

=== TEST CASES ===

Add a new describe("Error Handling Tests") block with beforeAll to load the app:

- POST /users with incomplete data (missing lname, username, email) → 400 Bad Request
- GET /users/999999 (non-existent user) → 404, verify "User not found"
- POST /users with duplicate email → 500
  - create a user first, then create another with same email but different username

=== RULES ===

- follow the same coding style as existing tests in the file
- use the same import style and TypeScript types
- use supertest (not request) as variable name
- use response.status (not response.statusCode)
- use toMatchObject() and toEqual() for assertions
- no `any` type13.2 ตัวอย่างโค้ดที่ Claude Code สร้างให้#
describe("Error Handling Tests", () => {
  let app: Express;
  let request: supertest.Agent;

  beforeAll(async () => {
    const module = await import("../index.js");
    app = module.default;
    request = supertest(app);
  });

  describe("POST /users - incomplete data", () => {
    it("should return 400 when lname, username, and email are missing", async () => {
      const incompleteUser = { fname: "Only" };

      const response = await request.post("/users").send(incompleteUser);

      expect(response.status).toBe(400);
      expect(response.body).toMatchObject<ErrorResponse>({
        error: "Missing required fields: fname, lname, username, email",
      });
    });

    it("should return 400 when only fname and lname are provided", async () => {
      const incompleteUser: Partial<CreateUserRequest> = { fname: "Test", lname: "User" };

      const response = await request.post("/users").send(incompleteUser);

      expect(response.status).toBe(400);
      expect(response.body).toMatchObject<ErrorResponse>({
        error: "Missing required fields: fname, lname, username, email",
      });
    });
  });

  describe("GET /users/:id - non-existent user", () => {
    it("should return 404 when user does not exist", async () => {
      const nonExistentId = 999999;

      const response = await request.get(`/users/${nonExistentId}`);

      expect(response.status).toBe(404);
      expect(response.body).toMatchObject<ErrorResponse>({
        error: "User not found",
      });
    });
  });

  describe("POST /users - duplicate email", () => {
    it("should return 500 when creating user with duplicate email", async () => {
      const timestamp = Date.now();
      const firstUser: CreateUserRequest = {
        fname: "First",
        lname: "User",
        username: `first_${timestamp}`,
        email: `duplicate_${timestamp}@example.com`,
      };

      // Create first user
      await request.post("/users").send(firstUser).expect(201);

      // Try to create second user with same email but different username
      const duplicateUser: CreateUserRequest = {
        fname: "Second",
        lname: "User",
        username: `second_${timestamp}`,
        email: `duplicate_${timestamp}@example.com`, // Same email
      };

      const response = await request.post("/users").send(duplicateUser);

      expect(response.status).toBe(500);
      expect(response.body).toMatchObject<ErrorResponse>({
        error: "Internal server error",
      });
    });
  });
});ผลลัพธ์การทดสอบที่คาดหวัง
 ✓ tests/api.test.ts (16 tests) 380ms
   ✓ API Integration Tests (12)
     ✓ GET / (1)
       ✓ should return 200 and welcome message 21ms
     ✓ POST /users (2)
       ✓ should return 201 and create user with unique username/email 132ms
       ✓ should return 400 when required fields are missing 5ms
     ✓ GET /users/:id (3)
       ✓ should return 200 and the created user data 17ms
       ✓ should return 404 when user does not exist 7ms
       ✓ should return 400 when ID is invalid 5ms
     ✓ PUT /users/:id (2)
       ✓ should return 200 and update user data 10ms
       ✓ should return 400 when ID is invalid 8ms
     ✓ DELETE /users/:id (3)
       ✓ should return 200 and delete user 11ms
       ✓ should return 400 when ID is invalid 4ms
       ✓ should return 404 when trying to get deleted user 4ms
     ✓ GET /users (1)
       ✓ should return 200 and array of users 7ms
   ✓ Error Handling Tests (4)
     ✓ POST /users - incomplete data (2)
       ✓ should return 400 when lname, username, and email are missing 4ms
       ✓ should return 400 when only fname and lname are provided 4ms
     ✓ GET /users/:id - non-existent user (1)
       ✓ should return 404 when user does not exist 5ms
     ✓ POST /users - duplicate email (1)
       ✓ should return 500 when creating user with duplicate email 17ms

 Test Files  1 passed (1)
      Tests  16 passed (16)
   Start at  14:04:49
Duration 853ms (transform 88ms, setup 199ms, import 95ms, tests 380ms, environment 0ms)13. Code Coverage#
การตรวจสอบ Code Coverage เพื่อดูว่าโค้ดถูกทดสอบครอบคลุมเท่าไหร่:
npm run test:coverageคำอธิบาย:
- % Stmts — เปอร์เซ็นต์ของ Statements ที่ถูกทดสอบ
- % Branch — เปอร์เซ็นต์ของ Conditional Branches ที่ถูกทดสอบ
- % Funcs — เปอร์เซ็นต์ของ Functions ที่ถูกทดสอบ
- % Lines — เปอร์เซ็นต์ของบรรทัดโค้ดที่ถูกทดสอบ
14. Best Practices สำหรับการทดสอบ API#
สิ่งที่ควรทำ:
- ใช้ข้อมูลที่ unique ในแต่ละ test (เช่น timestamp)
- ทดสอบทั้ง Success และ Error Cases
- ทำความสะอาดข้อมูลหลังการทดสอบ
- เขียน Test Case ที่อ่านเข้าใจง่าย
- ใช้
describe()จัดกลุ่ม Test Cases - ตรวจสอบทั้ง Status Code และ Response Data
- ใช้ Prisma ORM แทน raw SQL เพื่อ type safety
สิ่งที่ควรหลีกเลี่ยง:
- ใช้ข้อมูลแบบ Hard-coded ที่อาจซ้ำกัน
- เขียน Test Cases ที่ depend กันมากเกินไป
- ไม่ทดสอบ Error Cases
- ใช้ชื่อ Test Case ที่ไม่ชัดเจน
- ไม่ตรวจสอบ Response ที่สมบูรณ์
15. สรุป#
บทความนี้ครอบคลุม:
- Claude Code — สร้าง API อัตโนมัติด้วย Prompt เดียว
- Prisma ORM (Latest Version) — จัดการฐานข้อมูลแบบ type-safe พร้อม ESM support
- Prisma Migration — สร้างและอัปเดตตารางอัตโนมัติจาก schema
- Prisma Config — ตั้งค่า datasource ผ่าน
prisma.config.ts - CAMPP — Local Web Development Stack สำหรับ PostgreSQL และ Adminer
- Vitest และ Supertest — ทดสอบ RESTful API แบบอัตโนมัติ
- ESM & TypeScript — ใช้ ES Modules และ TypeScript สำหรับ type safety
แหล่งการเรียนรู้#
- Prisma Documentation ↗: เอกสารอย่างเป็นทางการของ Prisma
- Prisma ORM with PostgreSQL Quickstart ↗: คู่มือเริ่มต้น Prisma กับ PostgreSQL
- Vitest Documentation ↗: เอกสารอย่างเป็นทางการของ Vitest
- Supertest npm ↗: เอกสาร Supertest
- CAMPP ↗: ดาวน์โหลด Local Web Development Stack
ภาคผนวก: Best Practices สำหรับ Production#
ใช้ฐานข้อมูลแยกสำหรับการทดสอบ#
ไม่ควรใช้ฐานข้อมูลเดียวกับ Development หรือ Production ในการรัน Automated Tests ควรสร้าง Test Database แยกต่างหาก และกำหนด DATABASE_URL สำหรับการทดสอบโดยเฉพาะ
จัดการ Prisma Unique Constraint#
ใน Production ควรตรวจจับ Prisma Error Code เช่น P2002 (Unique Constraint Violation) และตอบกลับด้วย HTTP 409 Conflict แทนการส่ง 500 Internal Server Error
เพิ่ม Input Validation#
แนะนำให้ใช้ Zod หรือ Valibot สำหรับตรวจสอบ Request Body ก่อนบันทึกข้อมูลลงฐานข้อมูล
ปกป้อง Environment Variables#
ไม่ควร Commit ไฟล์ .env ขึ้น Git Repository และควรเพิ่ม .env ลงใน .gitignore
Logging และ Monitoring#
ในระบบจริงควรใช้ Structured Logging เช่น Pino หรือ Winston และเชื่อมต่อกับ Monitoring Platform เพื่อช่วยวิเคราะห์ปัญหา
Rate Limiting#
สำหรับ Public API ควรใช้ middleware เช่น express-rate-limit เพื่อป้องกันการโจมตีแบบ brute force และ abuse
Test Isolation#
แต่ละ Test Case ควรสามารถทำงานได้อย่างอิสระ ไม่ควรพึ่งพาข้อมูลจาก Test Case อื่น เพื่อให้ผลลัพธ์มีความน่าเชื่อถือและดูแลรักษาได้ง่าย
บทสรุปสำหรับผู้อ่าน#
บทความนี้เหมาะสำหรับผู้เริ่มต้นที่ต้องการเรียนรู้การสร้าง RESTful API ด้วย Prisma ORM และ PostgreSQL พร้อมการทดสอบแบบอัตโนมัติด้วย Vitest และ Supertest โดยใช้ Claude Code เป็นผู้ช่วยในการสร้างโค้ด การเข้าใจ Workflow ตั้งแต่ Schema → Migration → API → Testing จะช่วยให้สามารถพัฒนาระบบ Backend ที่มีคุณภาพและพร้อมต่อยอดสู่ระบบ Production ได้ง่ายขึ้น